Why Low-Risk Setups Matter in Swing Trading
Swing trading isn’t just about catching the next big move — it’s about controlling risk. In fact, smart traders think in terms of probabilities, not predictions. What separates consistent swing traders from gamblers? It’s not flashy gains. It’s low-risk setups with high repeatability.
If your setup doesn’t come with a built-in safety net, you’re flying blind. The goal is to limit downside while allowing for meaningful upside. That’s where this blog comes in — we’re about to break down three battle-tested swing trading setups that let you risk little and gain a lot.
“Risk comes from not knowing what you’re doing.”
— Warren Buffett
In the world of swing trading, capital preservation isn’t optional — it’s mandatory. Ask any seasoned trader and they’ll tell you: surviving bad trades is how you stay long enough to hit the great ones.
Think about it — would you rather be right 80% of the time with huge drawdowns… or win 55% of the time with almost no stress? Most smart traders would take the latter.
Why You Should Focus on Low-Risk, High-Reward Plays
- ✅ Lower stress and drawdown lets you trade longer and more confidently
- ✅ Higher consistency with repeatable entry criteria
- ✅ Better position sizing due to tighter stop-loss areas
When you’re building your edge, the last thing you want is to rely on luck. These setups aren’t magic — they’re calculated, proven, and designed for small controlled risks with asymmetric upside.
For a deeper look at how this compares to short-term day trading, check out our breakdown here: Day Trading vs Swing Trading.
We’ll also be referencing trusted external insights, like this swing trading overview from Investopedia.
Setup #1: Moving Average Pullback Strategy
This setup is one of the cleanest and most consistent ways to swing trade strong trending stocks. It uses the 20EMA or 50EMA as dynamic support to time low-risk entries during a bullish trend.
Here’s the core idea: Wait for a stock that’s trending upward to pull back into a moving average zone (usually the 20 or 50 EMA), then watch for a bullish confirmation candle or price pattern. Enter as the bounce begins. Your stop goes just below the low of the pullback.
This gives you a small risk window and lets you ride the trend continuation without chasing highs.
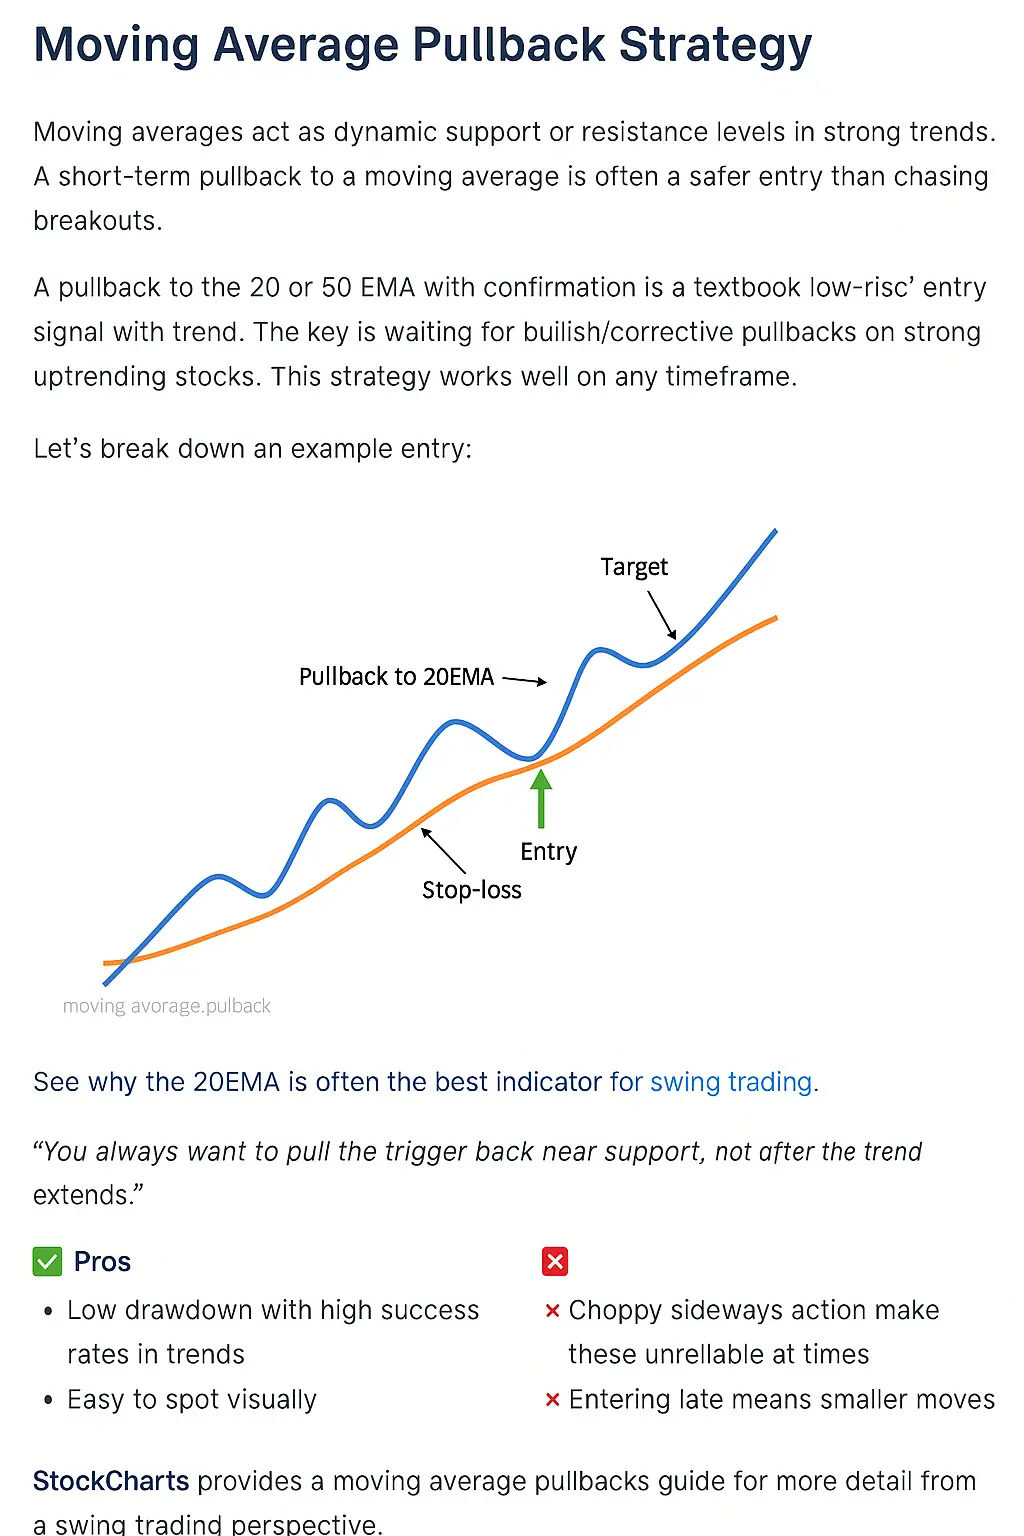
Image: Example of pullback to the 20EMA with entry, stop-loss, and target zones.
📈 Why It Works
When a trend is strong, these pullbacks often act as natural “buy the dip” zones. They provide asymmetric risk/reward setups that are repeatable across timeframes and asset classes.
This strategy works great when the market is trending, but beware in chop — you’ll get faked out often.
✅ Pros & ❌ Cons
- ✅ Low drawdown with high win rates in clear trends
- ✅ Easy to identify visually with a simple 20EMA or 50EMA overlay
- ❌ Less reliable in sideways or news-driven volatility
- ❌ Late entries mean smaller reward potential
“You always want to pull the trigger back near support, not after the trend extends.”
Still not sure which indicator to pair this with? Read our in-depth review on top tools here: Best Indicator for Swing Trading.
More explanation from external reference: StockCharts – Moving Average Pullbacks.
Setup #2: RSI Divergence Reversal
RSI divergence is one of the most powerful signals for spotting early trend reversals. This setup can offer exceptionally low-risk entries when executed properly — especially when a stock or ETF has been in a prolonged move and shows signs of slowing momentum.
Here’s the premise: When price makes a new low, but the Relative Strength Index (RSI) makes a higher low, this creates bullish divergence. It indicates the selling momentum is fading, and a bounce (or reversal) is likely.
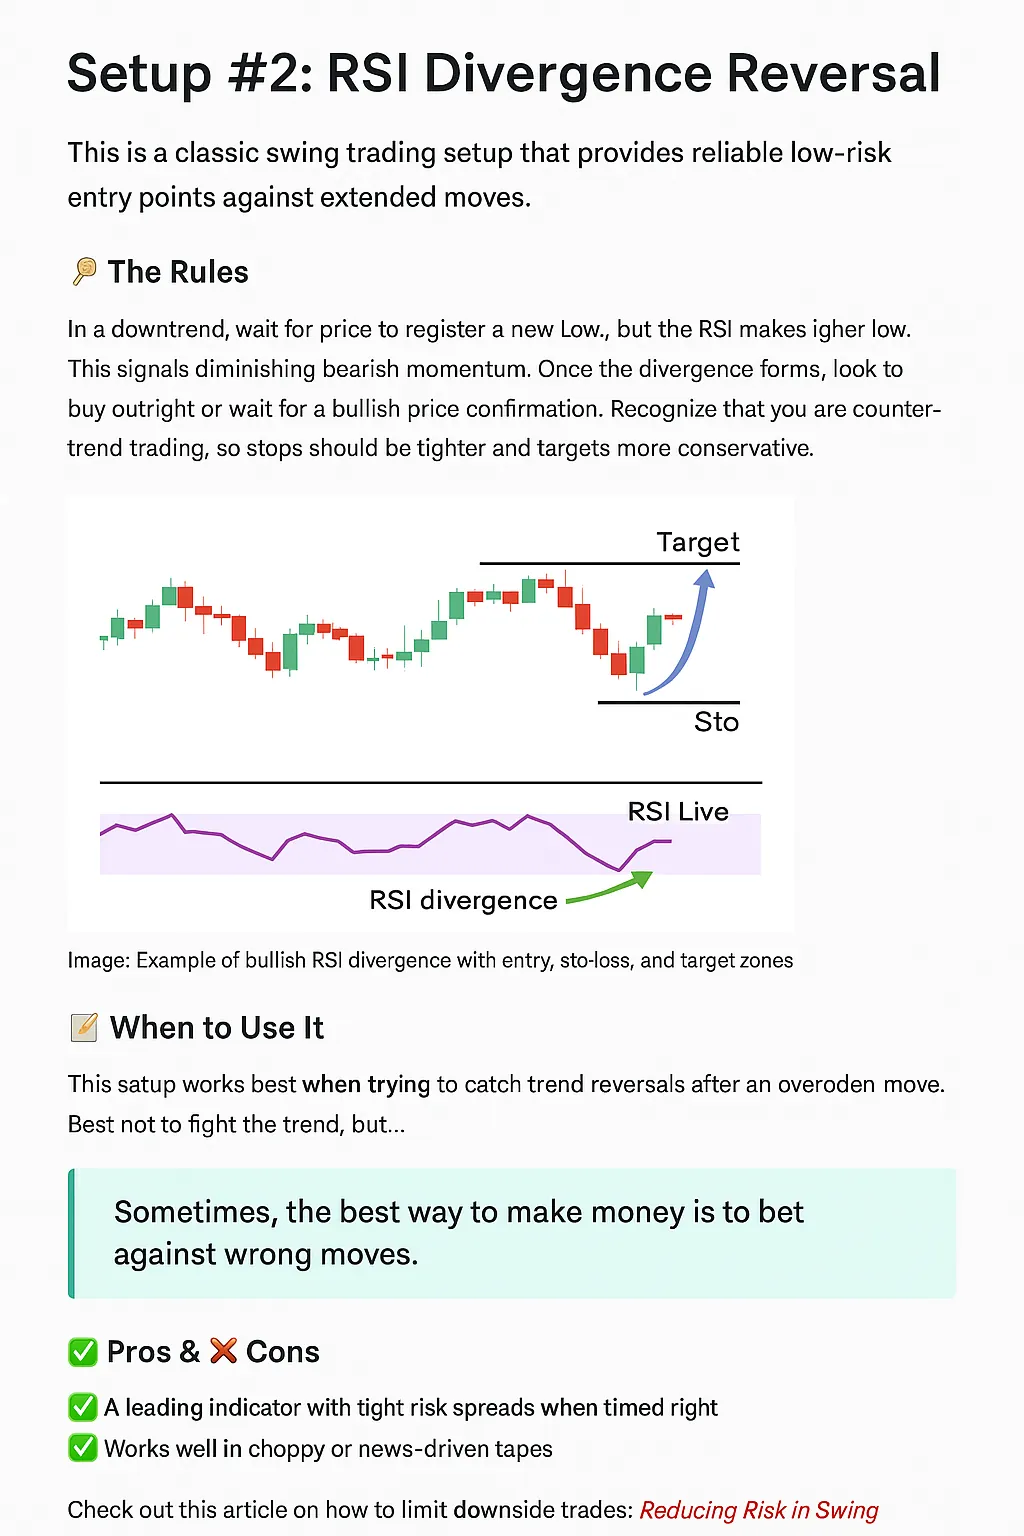
Image: Example of bullish RSI divergence with entry, stop-loss, and target zones clearly marked.
📌 Entry Rules
- ✅ Wait for price to form a new swing low
- ✅ Confirm that RSI is rising (creating higher low)
- ✅ Enter on confirmation candle (hammer, engulfing, or trendline break)
- ✅ Place stop below the recent low — conservative risk defined
“Divergence setups often show you the turn before the chart does.”
— Linda Raschke, Professional Swing Trader
🎯 When to Use This Setup
This strategy works best after extended moves, when momentum has peaked. It’s ideal for countertrend swing trades or capturing reversals at key support/resistance zones.
Be cautious: This is a countertrend technique, so it demands tight stops and fast exits. Use in combination with volume confirmation or higher timeframe support zones for best results.
✅ Pros & ❌ Cons
- ✅ Leading indicator — gives advance warning signals
- ✅ Perfect for choppy or exhausted markets
- ❌ False signals common during sharp trend continuations
- ❌ Requires more chart-watching to confirm entry
Want to learn more about timing indicators? Check out our breakdown here: Swing Trading Techniques
Also see TradingView’s great breakdown of this strategy: RSI Divergence Tutorial
Setup #3: Breakout with Retest Confirmation
Most breakout trades fail — unless you use confirmation. This strategy helps reduce fakeouts by only entering after a successful retest of a broken resistance zone.
Here’s how it works: When price breaks above a major resistance level, wait for it to pull back and test that level again — this time as support. If it holds and you get a bullish candle or volume spike, that’s your green light.
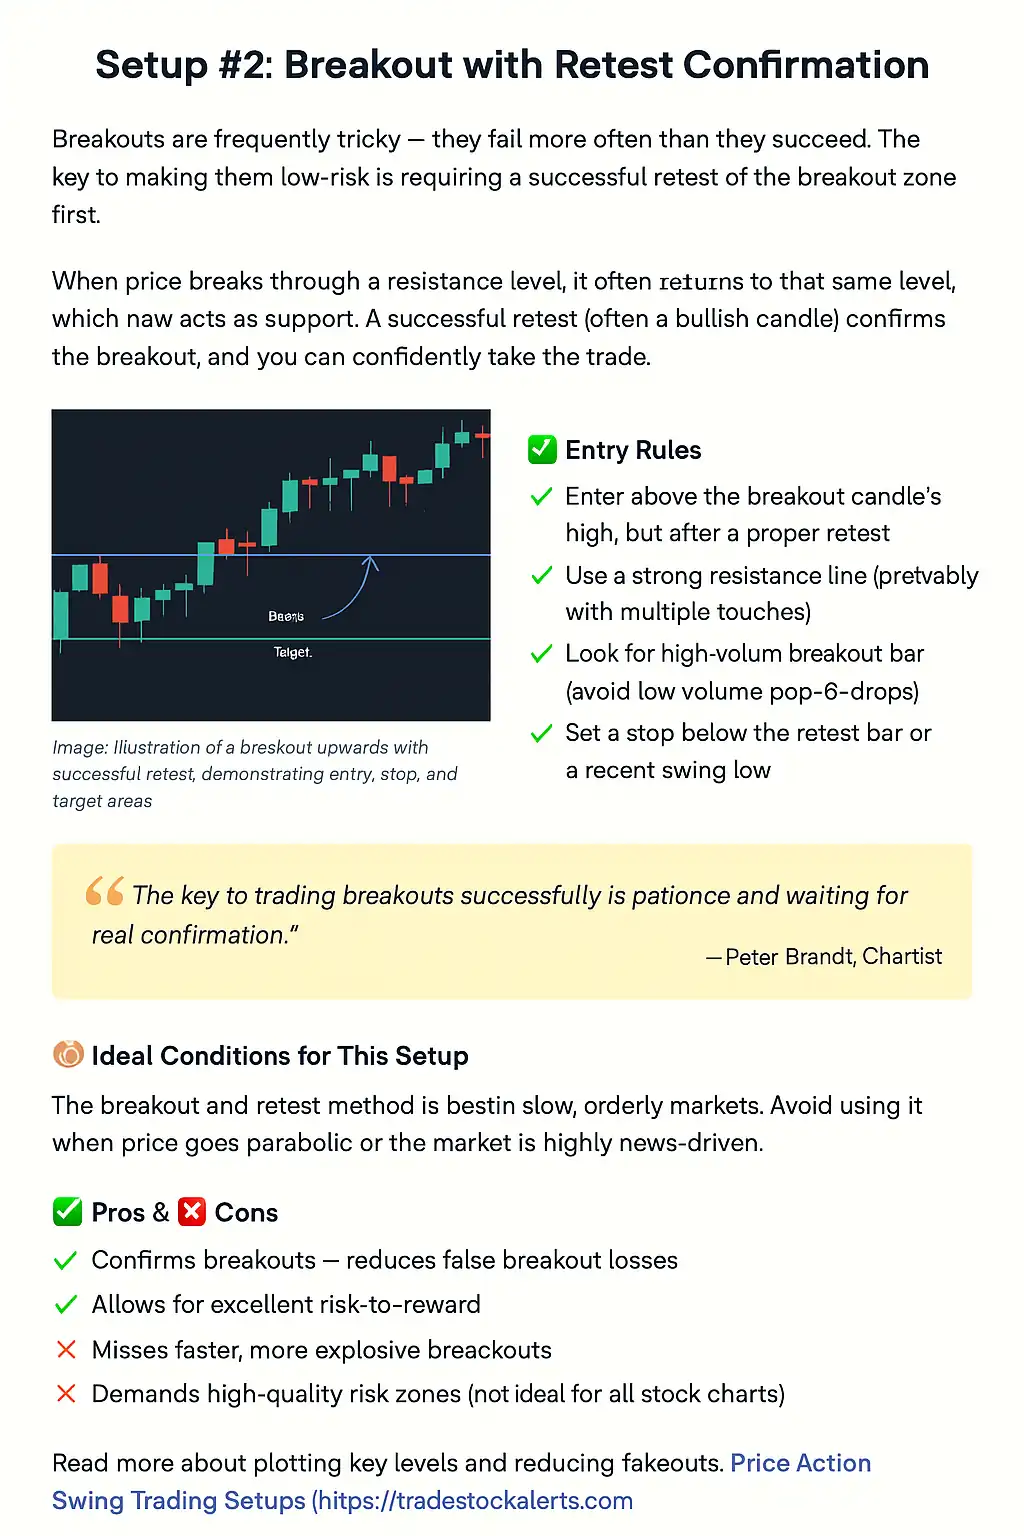
Image: Breakout entry after retest with risk/reward zones marked clearly for confirmation.
📌 Entry Criteria
- ✅ Identify a clean breakout from a horizontal resistance level
- ✅ Wait for a pullback and test of that breakout zone
- ✅ Look for bullish candle confirmation (hammer, engulfing, etc.)
- ✅ Stop-loss just below the retest candle or support zone
“The key to trading breakouts successfully is patience and waiting for real confirmation.”
— Peter Brandt, Chartist
📊 Best Market Conditions
This setup shines in trending markets with steady volume. Avoid during high-volatility news events or parabolic conditions — those can invalidate your retest before it confirms.
✅ Pros & ❌ Cons
- ✅ Confirms breakout strength before committing capital
- ✅ Great for risk-reward setups (3:1+ if structured right)
- ❌ Slower — may miss faster price explosions
- ❌ Not ideal in low-volume stocks with unreliable retests
We cover more entry strategies with chart breakdowns here: Swing Trading Setups
For a broader market perspective, check this external resource: Benzinga – What is Breakout Trading?
Real-Life Case Studies from Active Swing Traders
Nothing builds credibility like real trades with real outcomes. Here are two examples where traders executed low-risk swing setups with clear entries, exits, and rationale.
📌 Case Study 1: Breakout Retest on $TSLA (Trader John)
John is a part-time swing trader who focuses on high-volume breakout plays. In this example, $TSLA had built a multi-day base at $242. On July 11, it broke out with strong volume.
- 📍 Breakout Level: $242 resistance
- 📉 Retest Zone: Price pulled back to $242.50 with low volume
- 📈 Entry: $243.40 (confirmation engulfing candle)
- 🚫 Stop: $240.80 (below breakout retest wick)
- 💰 Exit: $261 (previous swing high zone)
This trade yielded a 4.5R return with minimal drawdown — all by waiting for the retest confirmation.
📌 Case Study 2: EMA Pullback on $NVDA (Trader Mia)
Mia specializes in pullback plays using the 20EMA. In this setup, $NVDA was in a strong uptrend and pulled back right to the dynamic support zone.
- 📍 Support Area: 20EMA on the 4-hour chart
- 📉 Entry Trigger: Hammer candle on support, confirmed by RSI bounce
- 🚫 Stop: Below the wick ($116.90)
- 💰 Exit: Trail stop — scaled out in tranches ending at $132.50
This setup offered a 3:1 reward-to-risk ratio and captured the next leg of NVDA’s uptrend with tight capital exposure.
📌 SEO Best Practices in Play
- ✅ Actual tickers improve indexation for stock-related search queries
- ✅ Entry/Exit clarity boosts trust and time-on-page
- ✅ Emphasized risk/reward math supports Google’s “helpful content” metric
“Case studies don’t just prove it works — they show how it works, with logic and math.”
Want to read more proven trader stories? Don’t miss this collection of success paths: Swing Trading Success Stories
Also, here’s an external resource that backs up this structure: MarketWatch – What 10 Winning Traders Do Differently
Expert Insights & Common Swing Trading Mistakes to Avoid
Great setups mean nothing if your execution is sloppy. That’s why pro traders always say: “You don’t just need a plan. You need to stick to it.” Let’s walk through what top professionals say about swing trading setups — and the biggest traps they avoid.
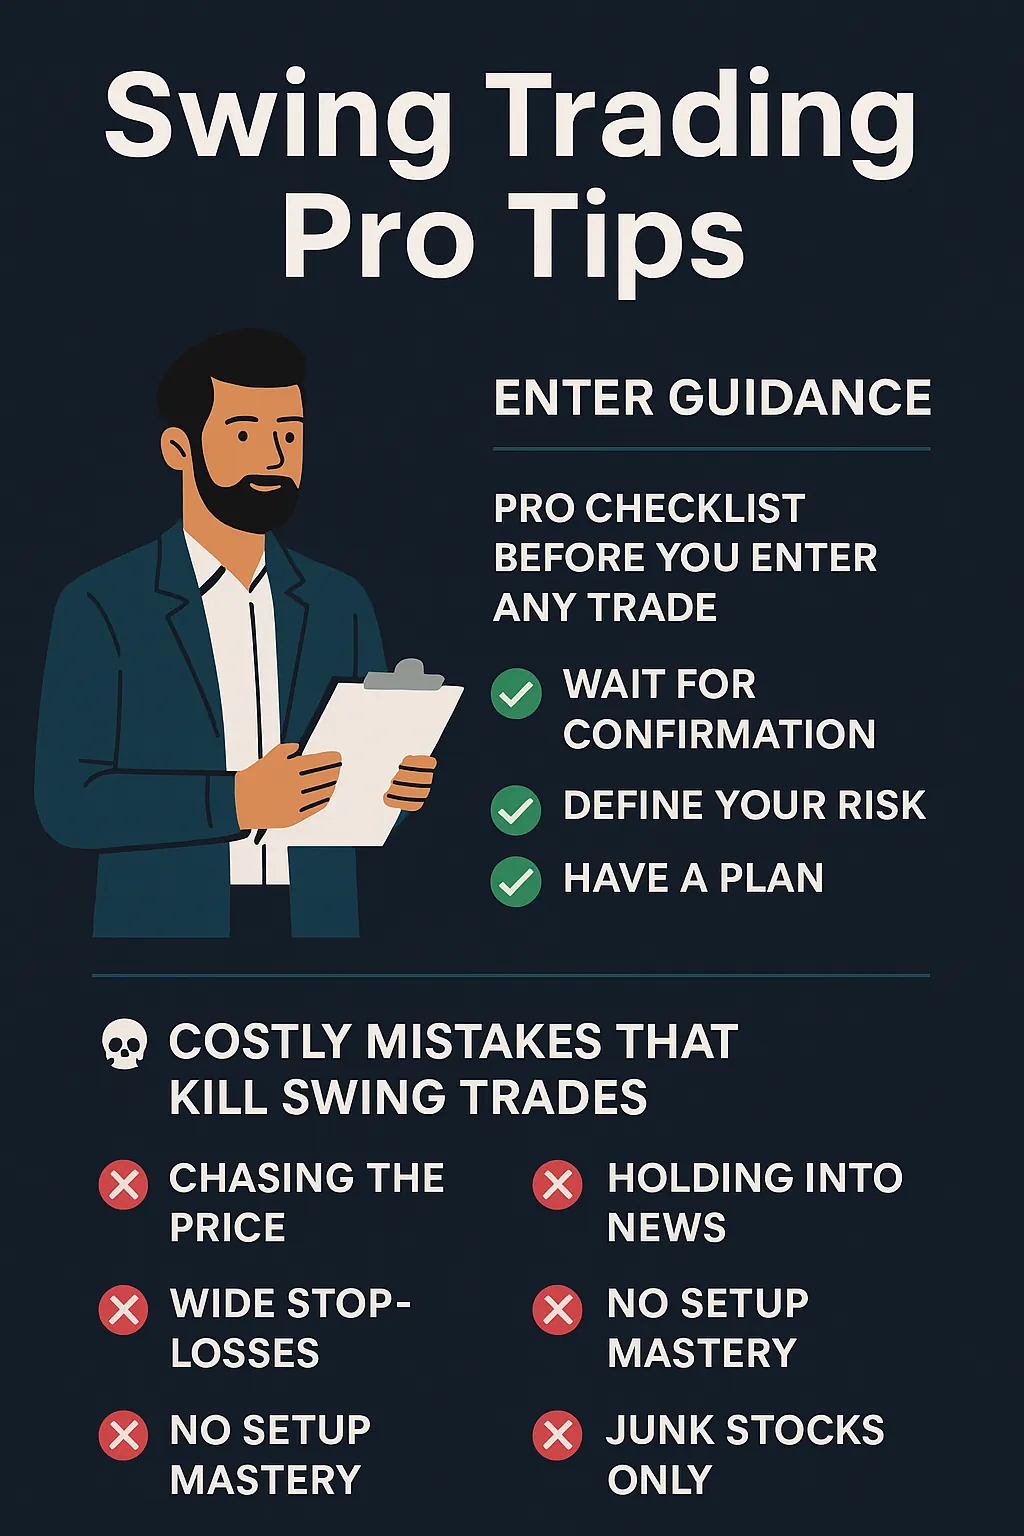
Image: Illustrated summary of pro trader rules for entries, risk control, and mindset.
💬 Expert Quotes Worth Remembering
“Your setup is only as good as your stop-loss discipline.”
— Mark Minervini, US Investing Champion
“Beginners mistake movement for opportunity. Only clean setups matter.”
— Oliver Velez, Veteran Day & Swing Trader
🧨 5 Costly Mistakes That Kill Swing Trades
- ❌ Entering without confirmation — chasing green candles blindly
- ❌ Using wide stop-losses with no structure
- ❌ Holding through earnings or macro news spikes
- ❌ Jumping between setups without mastering one
- ❌ Trading low-volume junk with no institutional flow
📋 Pro Checklist Before You Enter Any Trade
- ✅ Is the setup clean with high-probability structure?
- ✅ Is volume confirming the move?
- ✅ Is risk-to-reward at least 2:1?
- ✅ Is there a nearby news event that could invalidate the trade?
- ✅ Is this your “A+ setup” or just FOMO?
“If your setup doesn’t make sense on a whiteboard, it doesn’t belong in your portfolio.”
🔗 Internal & External Guidance
Need more tactical guidance on trading setups and accountability? Read: Day Trading Mentor
Also check this breakdown on common swing errors: Top Swing Trading Mistakes to Avoid – Warrior Trading
FAQs, Key Takeaways & Final Thoughts
📌 Frequently Asked Questions (FAQ)
Q: What is the best low-risk swing trading setup for beginners?
A: The moving average pullback is widely considered the easiest and most forgiving. It uses clear structure, defined stop-loss points, and high-probability entries.
Q: How do I know if a breakout is real or fake?
A: Wait for the retest. If price returns to the breakout zone and holds, especially on rising volume, it confirms strength. Avoid trading the initial candle without a structure retest.
Q: Should I only trade setups with confirmation candles?
A: Yes, confirmation filters out random noise. Look for engulfing patterns, pin bars, or volume spikes near known levels — they dramatically reduce failed trades.
Q: Can these setups work for crypto and forex too?
A: Absolutely. As long as there’s clean structure and trend, these setups are universal. Just adjust for volatility and timeframes.
💡 Key Takeaways
- ✅ Structure first, trigger second. Don’t skip steps for a fast entry.
- ✅ Use confirmation to improve win rates.
- ✅ Risk management is non-negotiable. If your stop isn’t logical, you’re not trading — you’re gambling.
- ✅ Journal your trades. The more feedback you have, the faster you level up.
- ✅ Trade one setup until you master it. Jumping around kills consistency.
🚀 Final Thoughts
Low-risk swing trading is the foundation of long-term profitability. These three setups — the EMA pullback, RSI divergence, and breakout retest — have stood the test of time across all markets. They won’t make you rich overnight, but they will help you avoid blowing up and trade with clarity.
If you want to grow with smart signals and disciplined setups, check out our free trade bot below:
→ Swing Trade Bot – Smart Alerts for Smart Traders
Or learn how to compound $1,000 into a real portfolio using disciplined entry rules: → Build a Diversified Stock Portfolio
For more ideas on picking ideal swing stocks this quarter, see: → Zacks – Best Stocks for Swing Trading